Tracking your Expenses with Web3Box CRM
For better record keeping in your company, we have created a feature within the CRM to add, track and view expenses. Whether it’s for travel, equipment, food or supplies, you can easily attach receipts, forms and files to the employee and/or customer.
The ‘IN’ amount comes from invoices and the ‘OUT’ amount comes from ‘projects’ you paid.

Manage Expense Menu
In this screen, enter all the information you have for the particular expense and attach a receipt.

Add & Edit Expense
That is all it takes to add an expense per employee and per customer. After you are done adding expenses, you can view them in the ‘IN/OUT Report’ section under the ‘Invoice Automation’ menu.
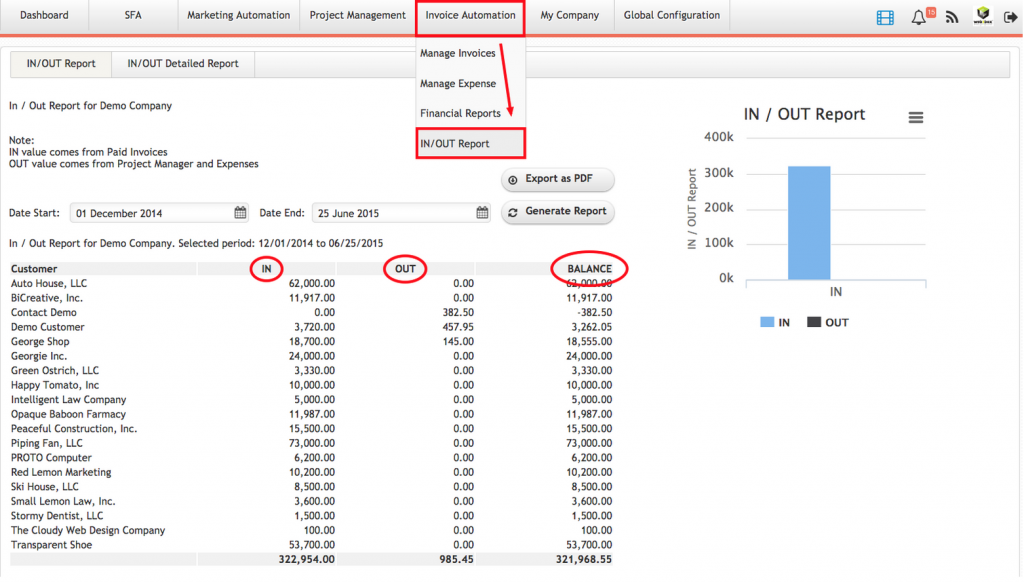
IN/OUT Report
This screen details the amounts coming IN for the invoices, OUT for the expenses and the BALANCE of the two on the top right.
Now, in order to view all the invoices issued by a particular client and additionally view the expenses, navigate to the ‘Customers’ interface and select the company you would like to check on.
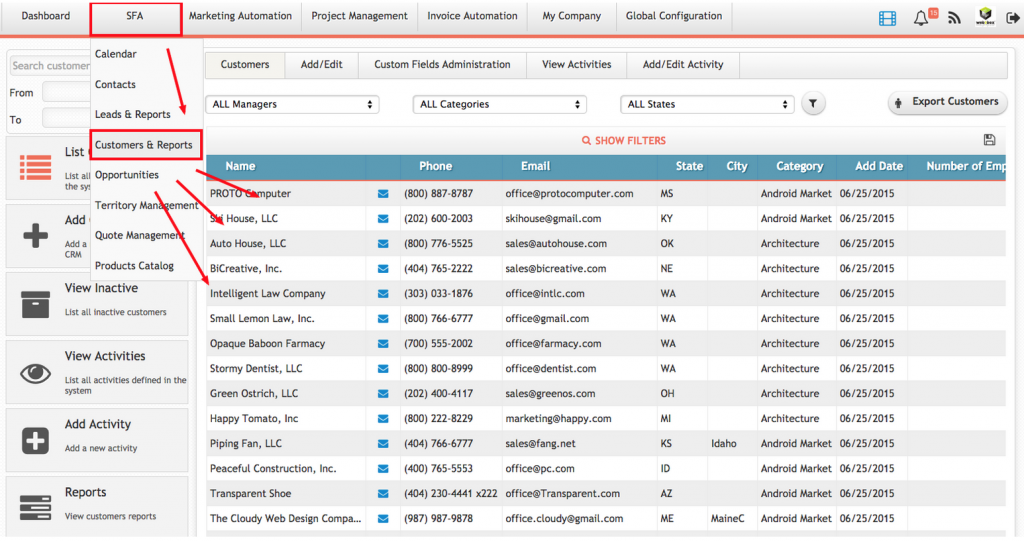
View Expense Per Customer
Once you found the one and press ‘Edit’; notice the different colors of the invoices.

View Invoices Per Customer
Blue marks an Open/New invoice, Red is Overdue and Green means the invoice has been paid.
Additionally, you may also access the IN/OUT report on this page by clicking on the Icon.

IN OUT Report per Customer
You will again see the invoice, the expense amounts and the balance of the two.
It is made very simple how you can add, track and view various expenses with your Web3Box CRM.
Grow your business with Web3Box CRM
Don’t waste time learning, use it to sell.
Start Your CRM Free Trial.

