Schedule Emails by selecting Date, Time and Time Zone
Within Web3Box CRM a user can send emails to Contacts, Leads or Customers. We were asked to add a function that will schedule the emails. Why? because let’s say you leave for a vacations and during this time some emails have to be sent. For this reason we have a added a brand new feature we call ‘Schedule Email’. The email can be scheduled by selecting Date, Time and Time Zone. Please enjoy the video that explains the functionality.
You may schedule emails from any of the interfaces, such as Leads, Contacts and Customers.

Schedule Emails
Select a record, in this case a Lead and choose Email option. This Email function will open Send Email interface where you can type your message or choose a predefined template (like a predefined newsletter or welcome message). Within the Send Email window is a button “Schedule Email”. Press that button and follow the Schedule Email screen’s instructions.

Schedule emails from View Leads
Below is the Schedule Email window where you can select a certain date, timezone and the time when you would like the email to be sent. Once you pressed save, the email will be scheduled.
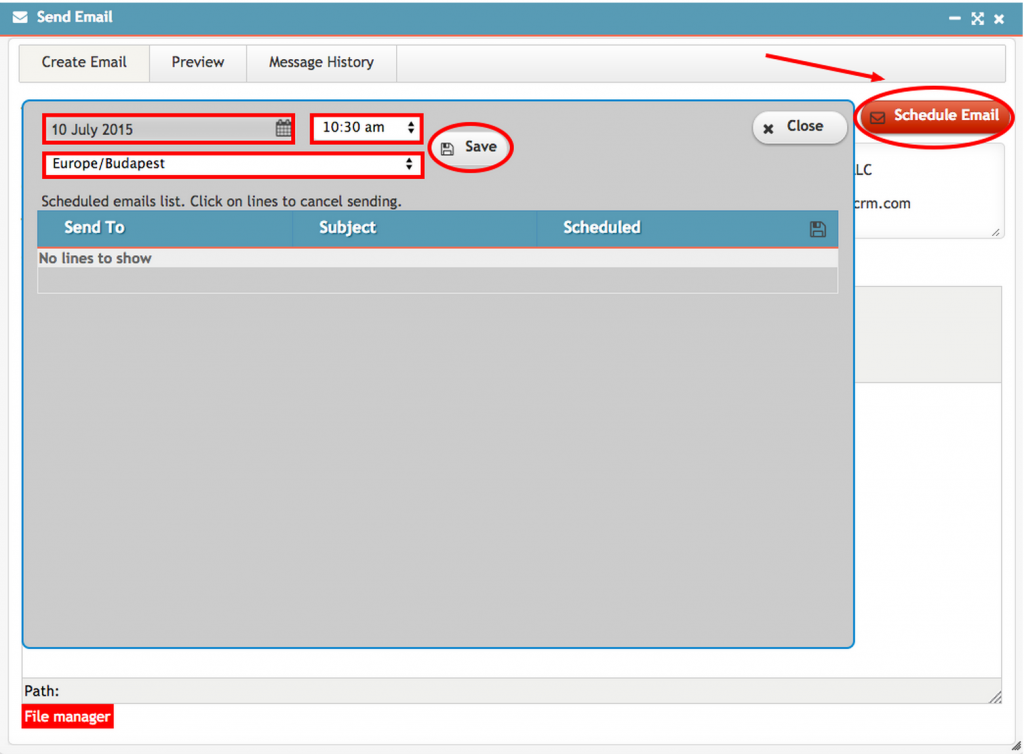
Schedule Email UI
You may have Email Scheduled for Contacts, Leads and Customer. Can be many of them. Then sometime you may very well change your mind and you want to cancel some. For each visibility and access, we added a link right on the dashboard called ‘View Scheduled Emails’. You notice that the link is in red color (easy to be viewed). Then we added the Schedule Email list inside of the Alerts section.
When you are in the list, click on one record and choose Cancel action. That will cancel the Scheduled Email action.
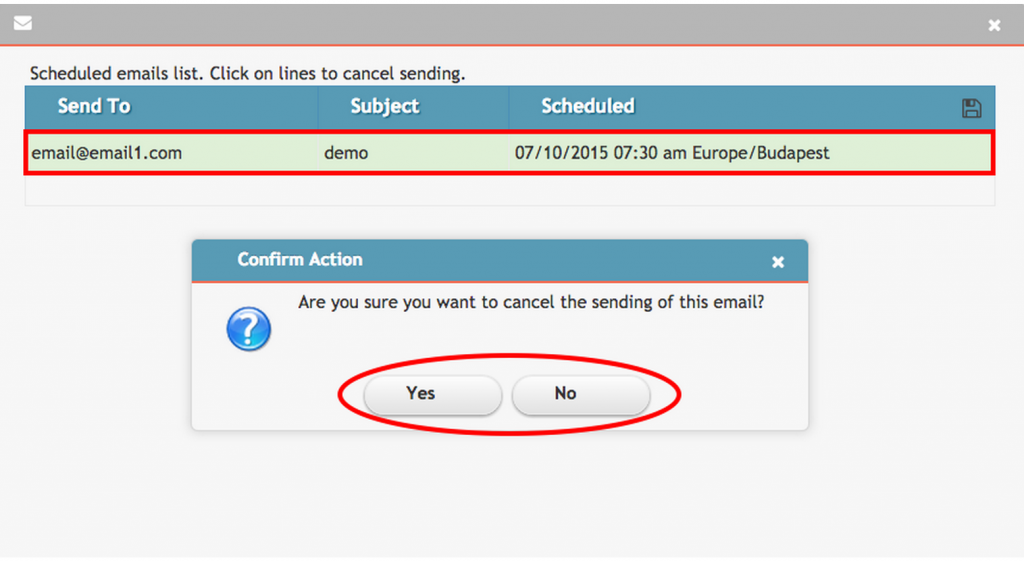
View Scheduled Emails
Grow your business with Web3Box CRM
Don’t waste time learning, use it to sell.
Start Your CRM Free Trial.

