Creating access for your clients
Providing your clients access helps to clarify the issues they may have concerning the progress of a particular task or project.
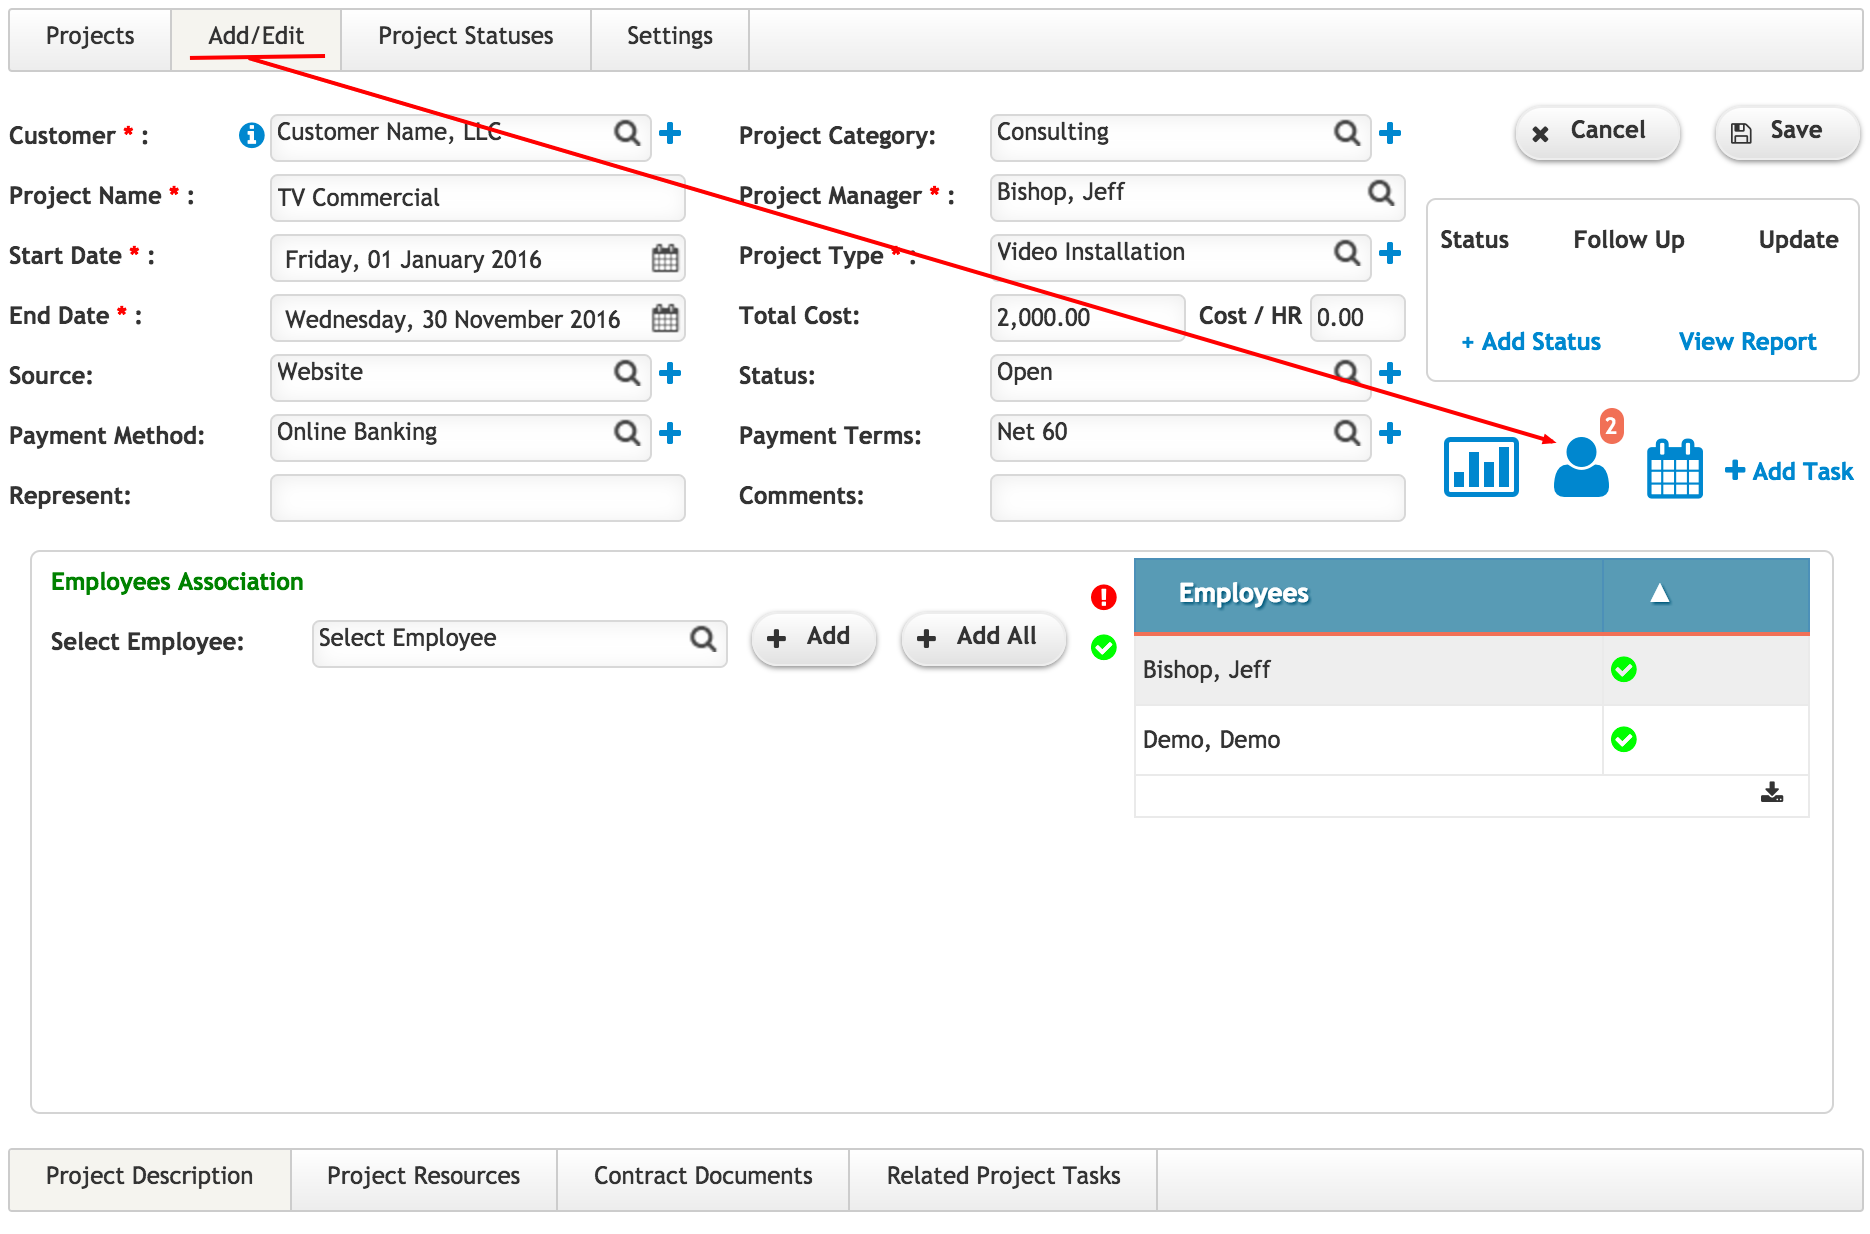
Setting this up is a two-part process: first you need to create a new user and assign them to their respective project(s), in the Project Management section of the CRM, under Projects.

You go to the Add/Edit page and select the Client Access icon.
That will result in a pop-up window emerging. This contains a basic form that needs to be filled out, and someone already working on the project and/or task can add either an existing client or a new one.
After typing the name, you press the ‘plus’ icon to add the client, bearing in mind that the email address associated with the client has to be unique and not already associated with a project or task.
All of the client listings you add can be further edited, removed from projects, set inactive in the CRM, or deleted.

As soon as a new client listing is added, an email is sent out containing credentials such as username and password, required to log in. Once the client logs in they can see the state of their projects. In the event a client has multiple projects proceeding at the same time, they can be assigned to all of them.

The key part is that Client Access allows the client the freedom to log in at any time and assess the progress, strengthening the trust between client and company.

